- 您现在的位置:买卖IC网 > Sheet目录240 > PAXTM100 (Red Lion Controls)TIMER DISPLAY 1/8 DIN PRESET 6 D
�� �
�
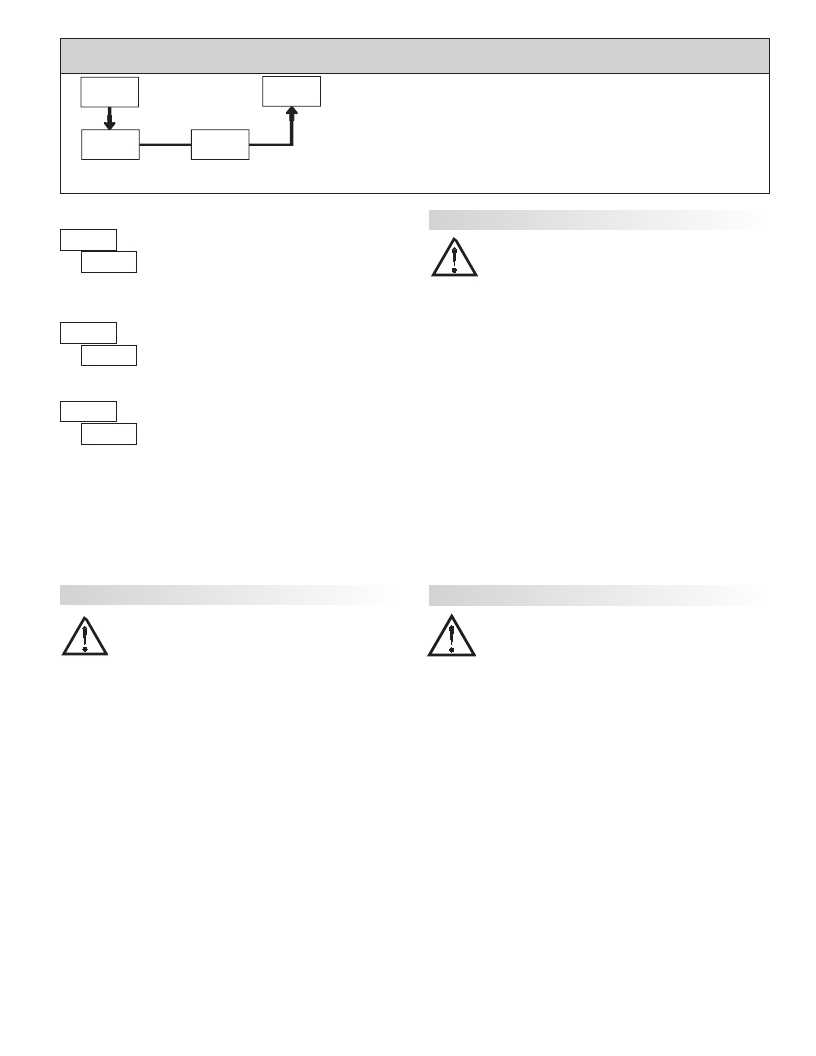
�6.9� MODULE� 9� -� F� ACTORY� S� ERVICE� O� PERATIONS� (� ?????� )�
�9-FCS�
�PAR�
�d-LEV�
�Display�
�Intensity� Level�
�COdE�
�Factory�
�Service� Code�
�Pro�
�PARAMETER� MENU�
�?????� ?�
�?�
�????� ?�
�?�
�??�
�????� ?�
�DISPLAYINTENSITYLEVEL�
�Enter� the� desired� Display� Intensity� Level� (0-15)� by�
�using� the� arrow� keys.� The� display� will� actively� dim� or�
�?� brighten� as� the� levels� are� changed.� This� parameter� also�
�appears� in� Quick� Programming� Mode� when� enabled.�
�RESTORE� FACTORY� DEFAULTS�
�Use� the� arrow� keys� to� display� ????� ??� and� press� PAR� .�
�The� meter� will� display� ?????� and� then� return� to� ????� ??� .�
�Press� DSP� key� to� return� to� Display� Mode.� This� will�
�overwrite� all� user� settings� with� the� factory� settings.�
�CALIBRATION�
�The� meter� has� been� fully� calibrated� at� the� factory.�
�Scaling� to� convert� the� input� signal� to� a� desired� display�
�?� ??� value� is� performed� in� Module� 1.� If� the� meter� appears� to� be�
�indicating� incorrectly� or� inaccurately,� refer� to�
�Troubleshooting� before� attempting� to� calibrate� the� meter.�
�When� recalibration� is� required� (generally� every� 2� years),� it� should� only� be�
�performed� by� qualified� technicians� using� appropriate� equipment.� Calibration�
�does� not� change� any� user� programmed� parameters.� However,� it� may� affect� the�
�accuracy� of� the� input� signal� values� previously� stored� using� the� Apply� (� ????� )�
�Scaling� Style.�
�Calibration� may� be� aborted� by� disconnecting� power� to� the� meter� before�
�exiting� Module� 9.� In� this� case,� the� existing� calibration� settings� remain� in� effect.�
�PAXD� -� Input� Calibration�
�WARNING� :� Calibration� of� this� meter� requires� a� signal� source� with� an�
�accuracy� of� 0.01%� or� better� and� an� external� meter� with� an� accuracy�
�of� 0.005%� or� better.� Resistance� inputs� require� a� resistance�
�substitution� device� with� an� accuracy� of� 0.01%� or� better.�
�Before� starting,� verify� that� the� Input� Ranger� Jumper� is� set� for� the� range� to� be�
�calibrated.� Also� verify� that� the� precision� signal� source� is� connected� and� ready.�
�Allow� a� 30� minute� warm-up� period� before� calibrating� the� meter.� ??� and� PAR�
�can� be� chosen� to� exit� the� calibration� mode� without� any� changes� taking� place.�
�Then� perform� the� following� procedure:�
�1.� Use� the� arrow� keys� to� display� ????� ??� and� press� PAR� .�
�2.� Choose� the� range� to� be� calibrated� by� using� the� arrow� keys� and� press� PAR� .�
�3.� When� the� zero� range� limit� appears� on� the� display,� apply� the� appropriate:�
�-� Voltage� ranges:� dead� short� applied�
�-� Current� ranges:� open� circuit�
�-� Resistance� ranges:� dead� short� with� current� source� connected�
�4.� Press� PAR� and� ????� will� appear� on� the� display� for� about� 10� seconds.�
�5.� When� the� top� range� limit� appears� on� the� display,� apply� the� appropriate:�
�-� Voltage� ranges:� top� range� value� applied� (The� 300� V� range� is� the� exception.�
�It� is� calibrated� with� a� 100� V� signal.)�
�-� Current� ranges:� top� range� value�
�-� Resistance� ranges:� top� range� value� (The� ohms� calibration� requires�
�connection� of� the� internal� current� source� through� a� resistance� substitution�
�device� and� the� proper� voltage� range� selection.)�
�6.� Press� PAR� and� ????� will� appear� on� the� display� for� about� 10� seconds.�
�7.� When� ??� appears,� press� PAR� twice.�
�8.� If� the� meter� is� not� field� scaled,� then� the� input� display� should� match� the� value�
�of� the� input� signal.�
�9.� Repeat� the� above� procedure� for� each� input� range� to� be� calibrated.�
�29�
�PAXP� -� Input� Calibration�
�WARNING� :� Calibration� of� this� meter� requires� a� signal� source� with� an�
�accuracy� of� 0.01%� or� better� and� an� external� meter� with� an� accuracy�
�of� 0.005%� or� better.�
�Before� starting,� verify� that� the� precision� signal� source� is� connected� to� the�
�correct� terminals� and� ready.� Allow� a� 30� minute� warm-up� period� before�
�calibrating� the� meter.� ??� and� PAR� can� be� chosen� to� exit� the� calibration� mode�
�without� any� changes� taking� place.�
�Then� perform� the� following� procedure:�
�1.� Use� the� arrow� keys� to� display� ????� ??� and� press� PAR� .�
�2.� Choose� the� range� to� be� calibrated� by� using� the� arrow� keys� and� press� PAR� .�
�(� ??� and� PAR� can� be� chosen� to� exit� the� calibration� mode� without� any� changes�
�taking� place.)�
�3.� When� the� zero� range� limit� appears� on� the� display,� apply� the� appropriate:�
�-� Voltage� range:� dead� short� applied�
�-� Current� range:� open� circuit�
�4.� Press� PAR� and� ????� will� appear� on� the� display� for� about� 10� seconds.�
�5.� When� the� top� range� limit� appears� on� the� display,� apply� the� appropriate:�
�-� Voltage� range:� 10� VDC�
�-� Current� range:� 20� mADC�
�6.� Press� PAR� and� ????� will� appear� on� the� display� for� about� 10� seconds.�
�7.� When� ??� appears,� press� PAR� twice.�
�8.� If� the� meter� is� not� field� scaled,� then� the� input� display� should� match� the� value�
�of� the� input� signal.�
�9.� Repeat� the� above� procedure� for� each� input� range� to� be� calibrated.�
�PAXH� -� Input� Calibration�
�WARNING� :� In� the� PAXH,� DC� signals� are� used� to� calibrate� the� AC�
�ranges.� Calibration� of� the� PAXH� requires� a� DC� voltmeter� with� an�
�accuracy� of� 0.025%� and� a� precision� DC� signal� source� capable� of:�
�1.� +1%� of� full� scale,� DC�
�2.� -1%� of� full� scale,� DC�
�3.� +100%� of� full� scale,� DC;� (300� V� range� =� +100� V� calibration)�
�4.� -100%� of� full� scale,� DC;� (300� V� range� =� -100� V� calibration)�
�Before� starting,� verify� the� Input� Range� and� Signal� Jumpers� are� set� for� the�
�range� to� be� calibrated� and� the� Couple� jumper� is� installed� for� DC.� Also� verify� the�
�DC� signal� source� is� connected� and� ready.� Allow� a� 30� minute� warm-up� period�
�before� calibrating� the� meter.� ??� and� PAR� can� be� chosen� to� exit� the� calibration�
�mode� without� any� changes� taking� place.�
�Then� perform� the� following� procedure:�
�1.� Press� the� arrow� keys� to� display� ????� ??� and� press� PAR� .�
�2.� The� meter� displays� ???� .� Use� the� arrow� keys� to� select� the� range� that� matches�
�the� Signal� Jumper� setting.� Press� PAR� .�
�3.� Apply� the� signal� matching� the� meter� prompt.�
�4.� Press� PAR� and� ?????� will� appear� on� the� display,� wait� for� next� prompt.�
�5.� Repeat� steps� 3� and� 4� for� the� remaining� three� prompts.�
�6.� When� ??� appears,� press� PAR� twice.�
�7.� If� the� meter� is� scaled� to� show� input� signal,� the� Input� Display� should� match�
�the� value� of� the� input� signal� in� the� Display� Mode.�
�8.� Repeat� the� above� procedure� for� each� range� to� be� calibrated� or� to� recalibrate�
�the� same� range.� It� is� only� necessary� to� calibrate� the� input� ranges� being� used.�
�9.� When� all� desired� calibrations� are� completed,� remove� the� external� signal�
�source� and� restore� original� configuration� and� jumper� settings.� If� AC� is� being�
�measured,� continue� with� AC� Couple� Offset� Calibration.�
�发布紧急采购,3分钟左右您将得到回复。
相关PDF资料
PB-1583-TF
BOX ABS 4.37X3.12X2" BK 1=10PCS
PB-1583
BOX ABS 4.37X3.12X2" BK 1=10PCS
PBS-11273
BOX ABS 6.30" X 3.75" X 1.41" BK
PBS-11275
BOX ABS 6.30" X 3.75" X 1.41" BK
PBS-11294-G
BOX 5.62" X 3.25" X 1.5" GRAY
PBS-11327-B
BOX 5.62" X 3.25" X 1.5" BLACK
PBS-11532-B
BOX 4.37" X 3.25" X 1.52" BLACK
PBS-12631AV2G
SWITCH PUSHBUTTON SPDT 6A 125V
相关代理商/技术参数
PAXTM110
制造商:Red Lion Controls 功能描述:TIMER, FIELD UPGRADEABLE GREEN DC 制造商:Red Lion Controls 功能描述:DC TIMER FIELD GREEN
PAXUSB00
制造商:Red Lion Controls 功能描述:USB PROGRAMMING CARD FOR PAX SERIES 制造商:Red Lion Controls 功能描述:USB OPTION CARD
PAY23015A12
功能描述:硬公制连接器 LOCKING PIN ASSEMBLY RoHS:否 制造商:TE Connectivity / AMP 系列:Z-Pack 产品类型:Receptacles 排数:5 位置/触点数量:110 安装角:Right 端接类型:Pin 外壳材料:Polyester 触点材料:Phosphor Bronze 触点电镀:Gold 类型:
PAY23015A1A1
功能描述:硬公制连接器 GRIP FINGER RoHS:否 制造商:TE Connectivity / AMP 系列:Z-Pack 产品类型:Receptacles 排数:5 位置/触点数量:110 安装角:Right 端接类型:Pin 外壳材料:Polyester 触点材料:Phosphor Bronze 触点电镀:Gold 类型:
PAY245A10
功能描述:手工工具 HM2 CONTACT EXTR TOOL-LONG PINS
RoHS:否 制造商:Molex 产品:Extraction Tools 类型: 描述/功能:Extraction tool
PAY245A106
功能描述:手工工具 RoHS:否 制造商:Molex 产品:Extraction Tools 类型: 描述/功能:Extraction tool
PAY245A11
功能描述:手工工具 HM2 CONTACT EXTR TOOL-SHORT PINS
RoHS:否 制造商:Molex 产品:Extraction Tools 类型: 描述/功能:Extraction tool
PAY245A112
功能描述:手工工具 INSERT BLOCK RoHS:否 制造商:Molex 产品:Extraction Tools 类型: 描述/功能:Extraction tool